Back and ready!

lipstick_picI have been tremendously busy these last few months and have neglected the very thing I love to do: beauty and hair blogging.

It’s a shame really, especially since both of these things continue to be a huge part of my life. I wanted to inform those of you that follow, that I will be back with quite a few product reviews, fashion styling and hair updates. I just can’t not update like this anymore.

These past few months, I’ve (of course) kept up with other natural hair bloggers/youtubers/vloggers and fashion/beauty gurus in my spare time. Let’s just say there is a lot of inspiration out there and I’m starting to feel it again.

Can’t wait to report back and have a pic or two of my hair since its been a while!

#journeytorapunzellength

Scrunchie Power! My (not so) Secret Obsession

scrunchiepower

Scrunchies have managed to creep their way back into mainstream fashion in the last few years. They were on the runway for Marc Jacobs three years ago, worn by Hilary Clinton last year (and scrutinized ) and who could forget their presence during the Olympics when all of the young female gymnasts sporting one to match their leotard attracted lots of public attention. Whether or not the scrunchy is on trend or not has not deterred my liking for them.

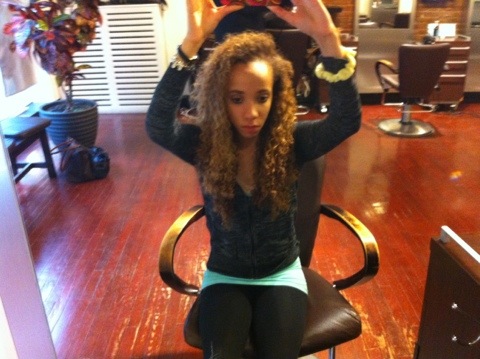
Here I am sporting my Goody brand scrunchies in my favorite go-to hairstyle: a bun and a high ponytail:

scrunchiebunponytailscrunchiescrunchiebun2

Now let’s rewind to the early 90s…

I used to wear these back in the 90s when I was young gymnast and dancer. They were a go-to hair accessory to ensure my locks didn’t get in the way of my art form. I had them in loads of colors and they did a great job of keeping my hair tucked away while also not being too rough on my fragile and naturally dry brittle hair.
Interestingly enough, after researching a bit online, I discovered the scrunchy was originally invented in 1986 by a woman by the name of Rommy Revson. Rumor has it, she created the scrunchy for herself in order to have a hair tie that wouldn’t snag or pull on her fragile her. By sewing fabric around the elastic, the fabric would act as a barrier between the elastic as to not pull or snag in the hair. Cool stuff. makes sense as to why I’ve chosen to adopt the scrunchy into my hair care regimen.
I have accumulated a pretty solid collections of plain, but colorful scrunchies ranging from black to blue to yellow to green. They aren’t crazy or festive, just meant for their original, intended job. I wear the scrunchies when I pineapple my hair at night. But not only that, when I’m in a rush and have to go off to work or out with friends or family, I put one on my wrist in case of a hair emergency. I personally think they’re cute and practical. They can look chic and not overdone if worn a certain way.
My main reason for liking them? They are gentle on my hair and have YET to get tangled up in my curly hair!
I love my scrunchies and the look of them in my hair despite much public disdain for the look. In the end,  for me they’re practical and comfy. And I am a 90s kid after all, so I might as well embrace it! What is your take on scrunchies?

My Five Fashion Favs for Fall/Winter

Edition: Bright & Comfortable

First off, Happy 1st of December! Hope everyone made out ok this November. I know many places, particularly in the US, have been experiencing record breaking weather and unfortunate storm damage.

There are some things I’ve been wearing repeatedly this time of year and I wanted to share with you all some of my favorites!

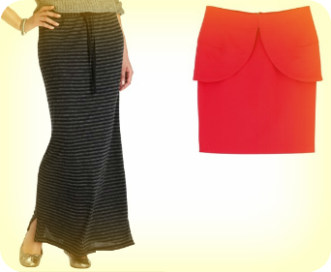
1.) Maxi skirts & Peplum skirts: This stripped skirt from The Loft is made of cotton and is extremely comfortable. I’ve been pairing this frequently with a chunky knit sweater in a variety of different colors since the colors on this skirt are neutral. This red peplum skirt is from H&M and can really dress up an outfit. I love wear black tights and black knee-high flat boots with this skirt.

Image

2.) Minnetonkas: These are classic and practical. I have been leaning more on the side of comfort during this cold and very stormy fall in the tri-state area. These are easy to slip on and get out the door in, and it is especially beneficial that it feels like I’m walking on clouds because of the amazing insoles.

Image

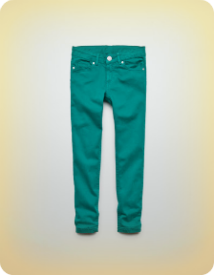
3.) Colored Denim: It’s fun, bright and comfortable. On days that I’m not feeling neutral, or gray (no pun intended), I like to add a pop of color. The colder months are a great time to add some bright (and happy) colors to your outfit. A color I’m loving this time of year is teal! These pants are from Zara kids! (Hey, it’s cheaper!)

Image

4.) Zip Cardigan: Cardigans are a classic layering piece to help keep you warm. Change it up a little by using traditional button-up cardigans and get a zipper look instead. I love the look of a zipper cardigan because it combines a jacket and a cardigan. This one is from The Loft.

Image

5.) Goody Ouchless barrettes: I’ve been trying to wear more protective styles this season, too since its been so cold. I usually use hair ties, but I wanted to change it up a bit. I watch kimmaytube on Youtube and she sold these on her online store. I decided to get them from Walgreens though since they’re considerably cheaper there. I can pull my hair up in a bun, a low ponytail, half-down half-up hair do and more. I love this also because it has no metal and doesn’t pull on my hair when I try to remove it.

Image

What fashion item are you sporting this season? And why is it your favorite?

*Picture credit from: http://www.loft.com, http://www.hm.com, http://www.zara.com & http://www.minnetonka.com and edited by myself.

Weight maintenance: Review on – Carnation Breakfast Essentials Powder

As I’m nearing the end of my gym trial (two weeks) at my local gym, I have to come to a decision if I’m willing to commit to a one year contract to not only the gym, but working out. A couple concerns about committing have arisen, one in particular is maintaining my weight.

One thing that has always been something I’ve been concerned about is my weight fluctuating, particularly in regards to losing weight. I have always had an issue with keeping weight on, and many have told me they wish they had this issue rather than being concerned with gaining weight. Let me tell you, it is not fun. Being underweight, like being overweight can be just as bad for you. One thing I noticed a few years back when I was even lighter, was my lack of energy and poor memory retention. It was an issue.

Now that I’m nipping this is in the butt and have steadily gained weight for the past year (+12 lbs to be exact), I have to up my food intake, particularly protein in order to gain weight to turn into muscle which will make it less easy to lose weight (Muscle weight is harder to lose than fat weight).

I’m finally at a good enough weight that I can now work on building muscle. I recently made a purchase for a breakfast blend drink to help me maintain my current weight and provide enough calories so I can build upon what I already have.

I recently purchased this pack of breakfast essentials in addition to my high protein breakfast of eggs, cereal and yogurt. I mix this in with my glass of milk and drink up!

I’ve only drank this about three times so far and I’m already noticing an improvement in the amount of energy I have.

Price: $6.49 

Availability: Most grocery stores (I got this from Bottom Dollar)

Ingredients: Nonfat Milk, Sugar, Maltodextrin, Cocoa processed with Alkali, Lactose, and less than 2% of Dicalcium Phosphate, Magnesium Hydroxide, Sodium Ascorbate, Soy Lecithin, Carrageenan, Natural and Artificial Flavor, Ferric Orthophosphate, Alpha-Tocopheryl Acetate, Niacinamide, Salt, Copper Gluconate, Zinc Oxide, Calcium Pantothenate, Manganese Sulfate, Vitamin A Palmitate, Pyridoxine Hydrochloride, Thiamine Mononitrate, Biotin, Phytonadione, Folic Acid, Vitamin D3, Vitamin B12.

Directions: “Mix with milk for a nutritional drink loaded with nutrition and flavor. Just a single powder packet mixed with 1 cup fat-free milk provides 220 calories, 13 grams protein to help build and maintain muscle, and 25% or more of the daily value for 21 essential vitamins and minerals, including calcium and vitamin D to help build strong bones.” -Nestle

Re-purchase?: Yes. At $6.49 a container that has 14 servings, this is well worth the money. Many nutritional powders are quite pricey and I can’t afford to spend a whole lot. I’ve noticed a slight increase in my energy and I LOVE the taste. It tastes like chocolate milk without the weird chemical taste that many nutritional powders may have. I’m actually going to make a glass now, despite it’s 6pm in the evening. 🙂

***Find about more information about this product here: http://www.nestlenutritionstore.com/brands/carnation/carnation-instant-breakfast-essentials-powder?rank=5&v1=rank&asc=1&catpath=

(pictured in the link is a 60pk, I purchased a different size that has only 14 servings).

Product Review: As I Am Coconut Cowash

I’ve had this product for a couple months now and thought it’s finally a good time to give my opinion of the product so this won’t be a first impressions kind of post. I realize that loads of ladies have already done reviews and most raved about it. I’m happy to say, I just purchased my 2nd container of the product from Amazon.com because I liked it so much.

This is a great alternative to shampoo, so if you do “no poo” washes, cowashing is a great way to cleanse your hair and scalp without stripping your hair of necessary oils. As you may know, sulfates, which are readily in most shampoos (unless otherwise noted as sulfate free) lather and strip your hair. I personally like to shampoo once a week because I have dandruff and product build-up issues, but on the days I don’t shampoo, I like to cowash. This product is also CG friendly if you use the Curly Gurl Method. Methylisothiazolinone, which is listed in the ingredients list of the product is a PRESERVATIVE and not a silicone, in case you’re wondering. 🙂

Product size: 16oz
Product price point: $6.99-$8.99
Availability: Sally’s Beauty, Amazon.com, AsIAmNaturally.com
Product features: “This light no suds conditioning cream gently removes residue including all of the things you’ve used to style and maintain your coils and curls. Now it’s time for a sparkling new beginning. This cowash is different from any other because it contains a special blend of natural ingredients that work to promote healthy hair growth from the follicular level.” -As I Am Naturally

Ingredients: Aqueous (Water, Aqua Purificada, Purified) Extracts: Cocos Nucifera (Coconut) and Citrus Reticulata (Tangerine)¹, Cetyl Alcohol², Cetrimonium Chloride, Cetearyl Alcohol², PEG-40 Castor Oil, Stearlkonium chloride, Cocos Nucifera (Coconut) Oil², Ricinus Communis (Castor) Seed Oil¹, Phytosterols¹, Serenoa Serrulata Fruit Extract¹, Quaternium-18, Potassium Sorbate, Fragrance/Parfum, Limonene, Methylisothiazolinone

Directions: Wet hair thoroughly. Rub a liberal amount of As I Am Coconut CoWash within palms and distribute throughout hair. Work product through hair and massage scalp with fingertips as you would a conventional shampoo. Carefully detangle hair with a wide-tooth comb. Rinse well.

Application: I wet my hair completely root to tip and then lathered the product on in sections. Because this product also has amazing slip, I will detangle in the shower with my shower comb. I detangle from tip to root since my ends tangle more than the rest of my hair. I then rinse is out completely and leave none in. Once, I did leave it in and it left my hair a little drier than I like… So, I don’t recommend it as a leave-in.

Scent: Because the key ingredients are *Tangerine, Coconut Oil, Castor Oil, Saw Palmetto and Phytosterols* it smells delicious. Not quite as strong as a Pina Colada, but similar to a coconut sweet. I smell the tangerine and coconut oil together.

Verdict: 4.8/5 – LOVED IT. This is officially a holy grail product in my hair care regimen. The only thing I don’t like, which many others have already mentioned, is the tub. I prefer pumps in all my products because it’s the easiest to get out. It’s a jar, so water can easily get in it in the shower and it’s inconvenient to dispense. For the size, the price and the ingredients this is not only very affordable but also good for your hair and scalp! I love cost effective products. One tub has lasted me over a month, too! I’m not heavy handed, though.

Have you used any As I Am products? Which one is your favorite?


*Product was purchased with my own money. I was not paid to do this review.

A New Oil for My Skin and Hair Regimen: Apricot Kernel Oil

This season I’m loving oil. Natural oils are a great way to help combat the cold, dry air here in the Northeast and tri-state area. One particular oil that has become a staple in my hair and skin regimen is Apricot Kernel oil. Strangely enough, I found it while browsing amazon.com while on the hunt for coconut oil to replenish my stock. Amazon.com has a great feature that suggests other products for you to look at and try based off of past purchases and past history of other customers. I clicked on an image of apricot kernel oil and decided to purchase because of vague information I knew of it off the top of my head, probably information I retained from a skin or hair forum I’m a member of. Coconut oil is also a staple, and so is olive oil, but I sometimes find both of these oils to be too heavy for every day use.

What I particularly love about apricot kernel oil is its lightness in both consistency and smell. It smells faintly of nut and goes on very lightly. I also love that is relatively inexpensive in comparison to other light oils such as jojoba oil. For 16 oz, I paid only around $7 (not including shipping) for the oil from amazon.com.  I don’t have to worry about being heavy handed and running low on it.

Here are some benefits of Apricot Kernel Oil I found and researched about*:

  1. It is a great source for Vitamin E! Super nourishing for both hair and skin.
  2. It is also rich in fatty acids and high in Vitamin A.
  3. It is also good for mature skin in that it promotes elasticity and suppleness.
  4. It has a longer shelf life than other oils, such as sunflower seed oil which tends to go bad fairly quickly.
  5. Its a very gentle and mild oil, so it benefits those of us with sensitive skin and even is safe enough for babies!

Apricot kernel oil is made by cold pressing and refined from dry kernels of an apricot. Also, the oil is readily found in many cosmetics. And, it is also edible in its pure form!


How I’ve added it to my regimen?

1.) My face:  After I’ve washed and used a toner, I place a dollop of apricot kernel oil and place it on a cotton round  and swipe it gently all over my face as a moisturizer. I use this only at night so far because I have combination/oily skin that is prone to oiliness.

2.) My Hair: After I’ve cowashed my hair in the shower, I coat my hair with my cantu shea butter leave-in and use a dime-sized amount of the apricot kernel oil and pat it throughout my hair. I then style with pink ecostyler or whatever styling product I choose for that day.


*Research information found on from healthguidance.org (http://www.healthguidance.org/entry/1807/1/Benefits-of-Apricot-Kernel-Oil.html)

Whose shea/mango butter mixture? – Mine!

I have to admit it, making my own hair/skin mixtures is a little hobby of mine that I enjoy. I’m a mixtress at heart, with unfortunate product junkie tendencies.You’d think making my own hair care products would cut down the actual amount of products I purchase, ummm, not so much!

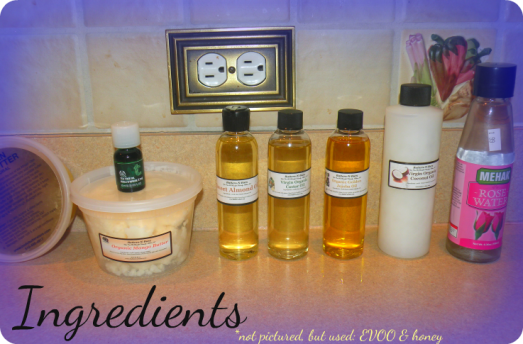
A few months ago, I purchased a plethora of oils and butters from butters-n-bars.com (using a coupon code, of course *curlynikki). My box arrived with: golden jojoba oil, castor oil, sweet almond oil, coconut oil AND mango butter. I already had shea butter on hand, as I frequently like to purchase from a variety of different vendors. :3

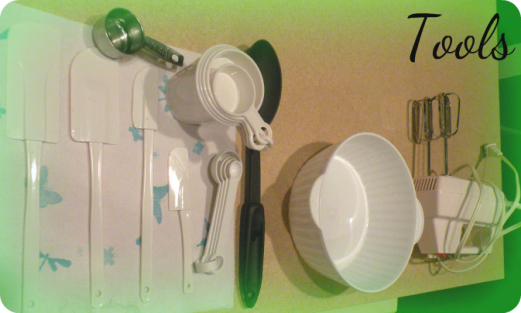
Anywho, after literally weeks, maybe even months of investigating the benefits of various oils and butters, I finally was ready to make my very own shea/mango butter hair mixture. Below are all the products I used (a bit overwhelming, tbh – you are always welcome to minimize) as well as the tools (purchased at the $1 store) needed to create my own mixture.

I purchased my ingredients from: butters-n-bars.com, amazon.com, the Body Shop and my local asian market.

My Shea butter/Mango butter Mixture Recipe (in order from most used, to least used)

  1. 4 oz of Mango butter
  2. 2 oz of African Yellow Shea butter
  3. 2 tablespoons of coconut oil
  4. 1 tablespoon of extra virgin olive oil
  5. 1 tablespoon of rose water (for scent)
  6. 1 tsp of jojoba oil
  7. 1 tsp of castor oil
  8. 1 tsp of sweet almond oil
  9. 1 tsp of honey
  10. 10 drops of tea tree oil


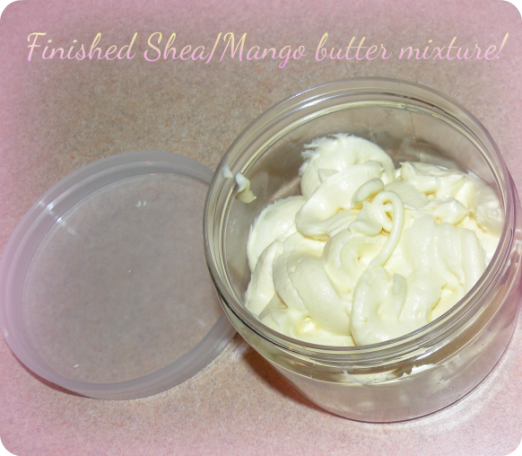
Method of mixing: I used the whip-freeze-whip method for mixing my butter. I first whipped together the mango and shea butter together, then added all of the oils and whipped again. I then placed the mixture in the freezer for 10 minutes until it hardened slightly. Whipped it again for about 10 minutes and the butter fluffed out to be about 12 oz from using 6oz of butter (so it became twice its size). I then put it in a zip-lock baggy, cut a whole from the corner and pressed it out like icing for a cupcake… got this method from napturals85 on youtube, haha.

Verdict on my recipe: Since I’ve been using this mixture for roughly two months now, I can finally give an in-depth opinion. And this is not biased or anything, but, I LOVE IT. The consistency is that of a thick butter. When you rub your hands together, the butter melts into an oil. I have to be light-handed with this recipe though because it has a tendency to over-moisturize my hair and make it limp. That is why I use this product only once a week, instead of every day. The scent is not my favorite, but I like that it keeps my hair shiny and curly for up to third day hair.
 

What ingredients do you use in your shea or mango butter hair mixture?

Brushes, combs and picks – OH MY!

My brush/comb collection has grown an absurd amount since I started paying more attention to my hair’s overall health and maintenance. I like to blame THAT on youtube and natural hair forums and especially talented bloggers – *ahem* hehe. If you were to ask me what my favorite channel is, I’d have to say that it’s youtube!  Because over time, I’ve built a trust to some beauty gurus and their channels and their opinions on certain products and tools. In fact, I’ve watched countless videos comparing the Denman D3 to the Denman  D4, and the tangle teezer to the Ouidad and so on and so forth. All these videos secretly were feeding the product junkie in me.

Many beauty and hair gurus stand by one said brush/comb whereas others swear by the finger combing method. I’ve tried finger combing, and it doesn’t do much for me, unfortunately, despite me not wanting to shell out any more money than I need to in order to have untangled and luscious locks. Ok, I lied a bit. I’m a product junkie at heart and love trying out new things and finger combing is the boring way to get my hair looking pristine. >_<

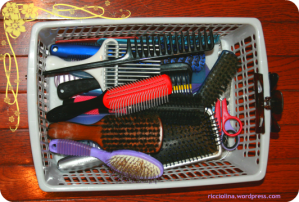
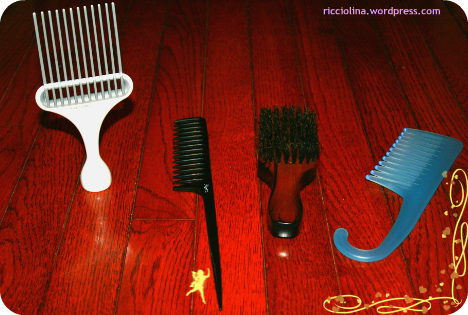
The picture above is my basket of non-heat styling tools, that desperately need to be cleaned, so please don’t mind that. These babies have a date with apple cider vinegar next week since they’re due for a good cleaning. Inside my basket I have: Denman D3,  Cricket pick, Cricket big & little comb, shower comb, wide tooth comb, vent brushes, John Frieda Paddle brush, a boar bristle brush (or two), fine tooth combs, a rat tooth comb and MORE! … a lot, lot more. I don’t use these all at once, obviously, but I use them according to the style I’m sporting that day.
My TOP used BRUSHES & COMBS
(1) Cricket anti-static hair friction
From?: Amazon.com
Price: $4.70*
How I use it-
Since my hair has grown to BSL (inching towards WL), its gotten flatter at the roots and lost a bit of its voluminous luster it used to have when it was at SL and shorter. So what I do to get back a bit more volume is I pick at my roots and pull upwards. I do this upside down and standing straight up, usually using a styling product such as eco styler gel or my Curls Unleashed mousse. This pick is also great because it’s anti-static, so I won’t have static roots – haha.
(2) Diane 9-inch Rat tail comb
From?: Amazon.com
Price: $2.29*
How I use it-
If you’re a habitual part switcher (one day you like your part in the middle and the next on the left side) such as myself, a rat tooth comb is your BEST friend. One thing I find aesthetically unpleasing about myself is when my part zigs and zags all over the place, unintentionally. I like my part to be as even as possible, unless I purposely want a zig-zag. One finger doesn’t cut it, but this comb is great! I like the tail on this comb because its thick and can part my hair easily and fast.
(3) Conair Boar Bristle Brush
From?: Duande Reade
Price:  $5.29*
How I use it-
My hair is notorious for baby hair frizzies! They love sticking up, especially when it’s humid. Normally, I don’t mind this if I’m wearing my hair out. But if I want my hair back in a slick ponytail or cute bun on top of my head, my hair needs to lay flat. I brush my edges down very gently with this brush, using my blue or pink ecostyler gel. And the remaining hair, I brush smoothly into a bun or ponytail using a little bit of water, cantu shea butter, and a drop of an oil such as jojojoba oil or olive oil.
(4) Shower comb
From?: Sally’s Beauty Supply
Price:$1.69*
How I use it-
My favorite place to detangle my hair is under the shower, especially in the winter when its cold. This is also my favorite way to detangle because its the fastest. I’m a wash-n-go kind of girl and like my hair to be detangled by the time I’m out of the shower. I keep one conditioner for cleansing and one for detangling in my shower and start at the ends of my hair and work my way up my hair.
*Note: This is AROUND what I paid. So depending on where you decide to purchase this product, it may be more ore or less than the price I listed. 🙂
What are YOUR most used brushes/combs? Or are you finger comber with magical fingers?

On a “No Heat Challenge” – My 5 month celebration!

Hello all!

Sorry its been a while, but life has been SO exciting and hectic in these last few weeks that I was overlooking my BLOG… I know, shameful! But I’ve been itching (no, not dry flaky scalp itching lol) to write about the “no heat challenge” I decided to partake in starting in May 2012! It has officially been 5 whole months since I started that challenge and I can proudly announce I have not used ONE heat tool (including blow dryers) for FIVE whole months. I’ve worn my curly hair loud and proud! And better yet? I still don’t want to. I want to see if I can make it to half a year, or 6 months, which I know shouldn’t be too difficult.;)

Furthermore, I  wanted to share with you all a gem I stumbled upon on youtube! A video demonstrating how to achieve straight hair WITHOUT heat. I follow loads of youtubers, some younger than myself, some older, because we can obviously get advice from all walks of life. This particular youtuber is young, yet so knowledgeable. Check out her video! I think this works well with curly or wavy hair. It works somewhat well with my hair, but my hair has a tendency to frizz, so, eh.

What do you all think? Have you ever experimented with this technique?